
View Trade Monitor tables
To view a Trade Monitor table listing the trades filtered with a specific preset, click that preset on the Trade Monitor dashboard.
When a new trade matching the preset parameters is received, it is highlighted in the table for 3 seconds.
To exit the table and return to the Trade Monitor dashboard, click 〈 displayed on the left of the table name.

General information
The following data is provided about each trade included in a Trade Monitor table:
- Platform
The source from which trade-related data was received.
- Account
The name of a connector account on which a trade was made.
- Taker
The name of a connector that made a trade.
- Maker
The name of a liquidity provider that acted as a maker of a trade.
- Type
The order type:
MarketLimitPreviously quotedStop
- Side
The trade side:
BuyorSell.- Volume
The trade volume in lots along with the volume in contracts.
- Symbols
The traded symbols.
- Price
The price, in USD, at which a trade was executed.
- Slippage
The price slippage indicating the difference between the price requested in the order and the actual price at which the order was executed.
- Trade ID
The identifier assigned to a trade by a trading platform.
- Time
The date and time when a trade was executed.
- Latency
The time delay between order placement and its execution, in ms.
- Status
The trade status:
FilledRejectedPartially filled
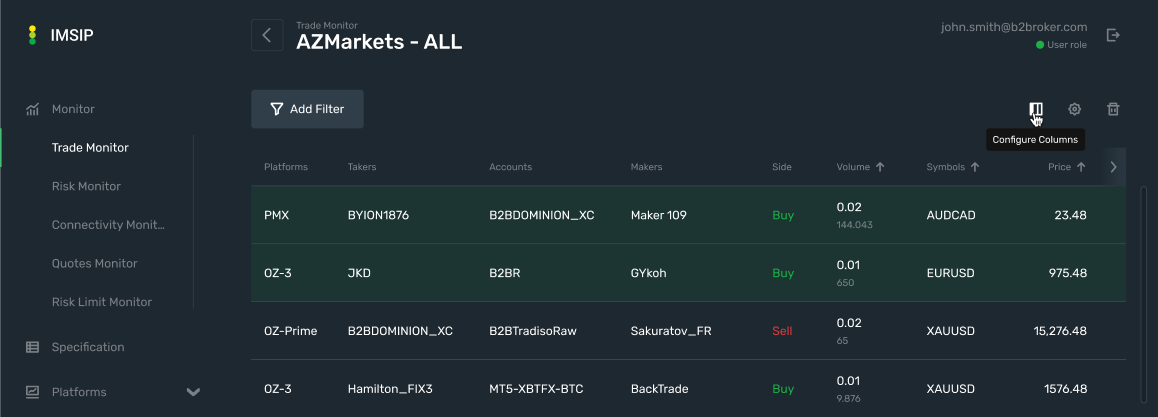
Configure table columns
You can select columns that you want to display in a Trade Monitor table and hide the others. In addition, you can rearrange the order of columns in the table.
Configure table columns as follows:
Click the Configure Columns button displayed at the top right of the table.
In the displayed list, select the checkboxes for the columns that you want to include in the table and clear the others.
To rearrange the column order, select a column and drag it up or down to the needed position.
The changes you make are immediately applied to the table.
To return to the default configuration of table columns, click Reset to default.
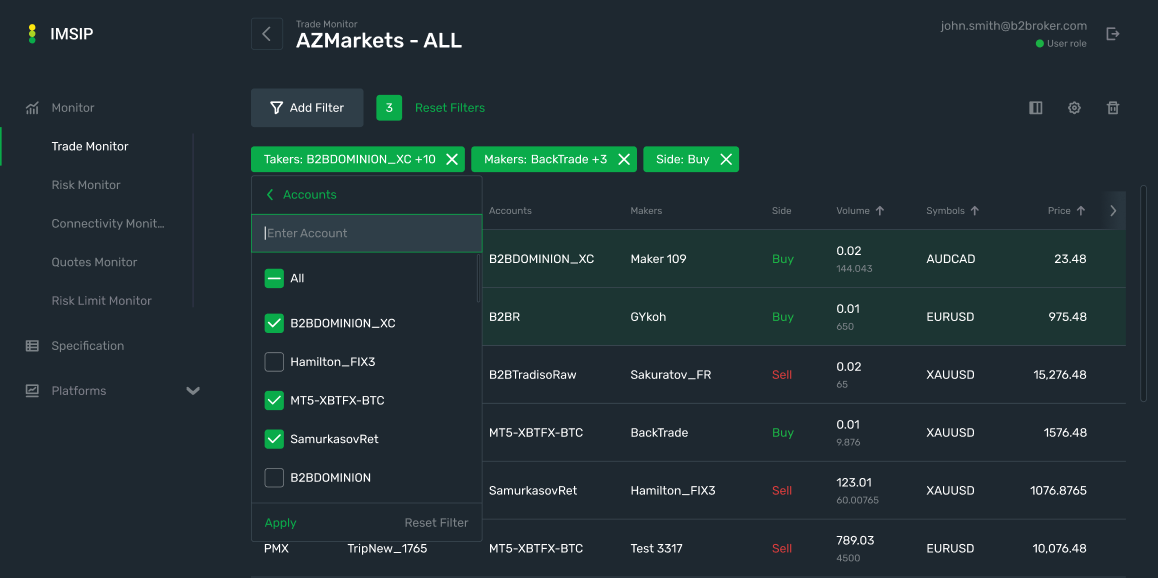
Filter and sort table data
Filtering
You can filter a list of trades displayed in a Trade Monitor table.
Note
Table filters are used to temporarily hide some data in a table and focus on the data you want to explore. They don’t affect the parameters configured in the corresponding Trade Monitor preset.
Filter table data as follows:
Click the Add Filter button displayed above the table.
In the dropdown, select the name of a table column by which you want to filter data.
Configure filtering parameters specific to the data type of the selected column.
To apply the configured filter, click Apply.
The applied filter is added above the table and the display of the table data is updated according to the filter parameters.
You can filter table data by multiple columns at a time. The number of applied filters is displayed next to the Add Filter button.
To clear a specific filter, click ✖.
To clear all applied filters, click Reset Filters.
Sorting
By default, data in a Trade Monitor table is sorted by the date and time of trade execution (by the Time column) in descending order, meaning that the most recent trade is displayed at the top of the table.
You can sort the table data by other columns. For the columns by which table data can be sorted, an arrow is displayed next to the column header, indicating the sorting order:
Up arrow — indicates that column values are displayed in descending order (you can click the arrow to apply ascending order).
Down arrow — indicates that column values are displayed in ascending order (you can click the arrow to apply descending sorting).
Note
You can sort table data only by a single column at a time.